Simplex 40S in 7/8ths: bonnet fitted...
It now looks like a real Simplex! That's the headline! I've finally got to the stage where I have added a bonnet over the radio control and it's taken on the character of the prototype...
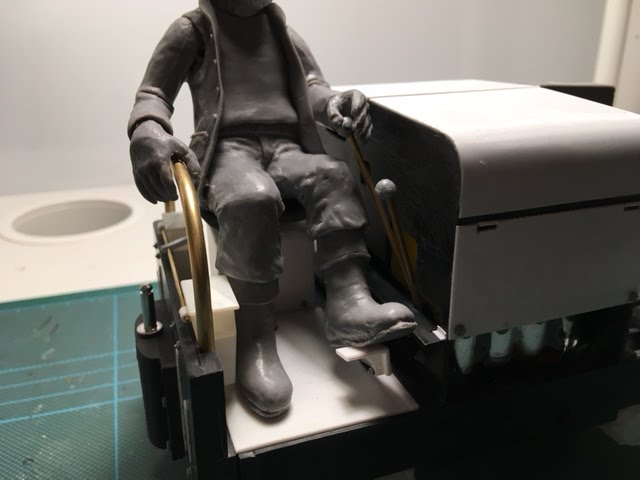

I chose the 40S because it was short and stubby, and had the bonnet curves in the later orientation - a feature I quite liked, so I'm pleased with how my attempt at replicating this has come out. First though I'll mention the driver, he is a Model-earth 'winter driver' figure, and I've now fitted his second arm and hand, which is grasping the drive handle. This is 0.9mm brass with a blob of blu-tac superglued to the end, and coated in more superglue. The same for the shorter reverser handle. Not 100% accurate in location but with the driver fitted they look fine to my untrained eye, and match the character of the prototypes I've studied.


The bonnet is actually made of a core and overlays. The core is 80 and 60 thou black styrene chosen for strength as this part is removable. The front and back of the bonnet were cut first in the thinner material, and had cut outs made for the various controls, fillers etc - although not all of them are there, as I wanted some strength in the bonnet front so behind the radiator it's solid when it should be open. The sides and top were next, the sides in 80 thou with strengthening fillets in the corners, and the top was 60 thou. The curved sections were formed initially with more black styrene in 60 thou 3mm wide strips, all assembled with Humbrol polystyrene cement. Once this had dried, it was smoothed over with sand paper to get a smooth curve to the edge, and the overlaps all level.


Then the thin (20 thou) white styrene overlays could be added. The lower sides and bonnet front were done first, and have small cut outs for hinges (in styrene rod) with securing nuts (from Cambrian) attached. These were attached using the liquid polystyrene cement, as they are flat pieces, where an extended drying time isn't a concern. Once these were firmly attached I began work on the bonnet top, using the same 20 thou styrene but this time using Superglue gel. Applying the gel to the bonnet and spreading it out, you have a little longer to work then with the superglue in liquid form, so the bonnet can be held in position as it dries to form neatly around the curve. I tried both ways, once all in one go, and the second the vertical bit first, before forming around the curve - both had positives and both had negatives and you can't tell the difference in the finished result. You need to firmly press this into place over a ten to twenty second period to ensure it stays stuck - once dry I used fine wet an dry paper to clean up and round the edges, and the hinge along the top was added in round styrene rod. I added 1.5mm L section styrene to the frames, which holds this bonnet in place, and will mean it's removable. In this last shot you can see that the sandboxes are now in place at the non driving end, although I've yet to add the nuts to the buffer beams.


Next up I need to add the fillet around the driving end of the bonnet, fabricate some brackets and low relief for the bonnet area, and then move onto the radiator. More soon...
Comments
Post a Comment
Thank you for leaving a comment on my blog - I appreciate you taking the time to share your views. If you struggle to log in, please turn off the ‘block cross-site tracking’ setting in your browser.
James.