21st century white metal kit?
As a teenager I built a white metal kit of a GWR 16xx Pannier, and since I've worked on 009 white metal kits along side developing an approach and style to my own kits for Narrow Planet, EuroNG, 6point5 and most recently Planet Industrials...
I have noticed a new company, Hardy's Hobbies offering a modern take on the beginners kit - taking a ready to run chassis and a basic 'plonk on body', very familiar to me in 009. I was interested in seeing if this beginners kit could be breathed upon to raise it's standard and finish to pass muster against other more serious offerings. Andrew, of Hardy's, offered to send me one for free on the basis I write about my experiences, so this is the first instalment.

The kit, a Hudswell Clarke 0-6-0st is designed to use a Hornby Peckett B2 chassis. Above is what you get, a one piece body, including all fittings, a sprue of detail parts and some bags of wire and handrail knobs etc.

The body is a neat piece of design, however the low cost can be seen in the production. The front and back of the cab, tanks, bunkers etc have some layering, the result of the angle of the print in the resin tank one assumes, I've seen similar on our own Planet Industrials prints when we've not used the best orientation for a part. In addition, the sides of the cab and tank are particularly uneven, and there is some visible sagging in the side tank. Printing in resin can have this effect if using a lower resolution, and quicker processing time. However, I was confident with time that all this could be rectified in finishing, and the general kit detail looked like it would reward a bit of careful finishing.
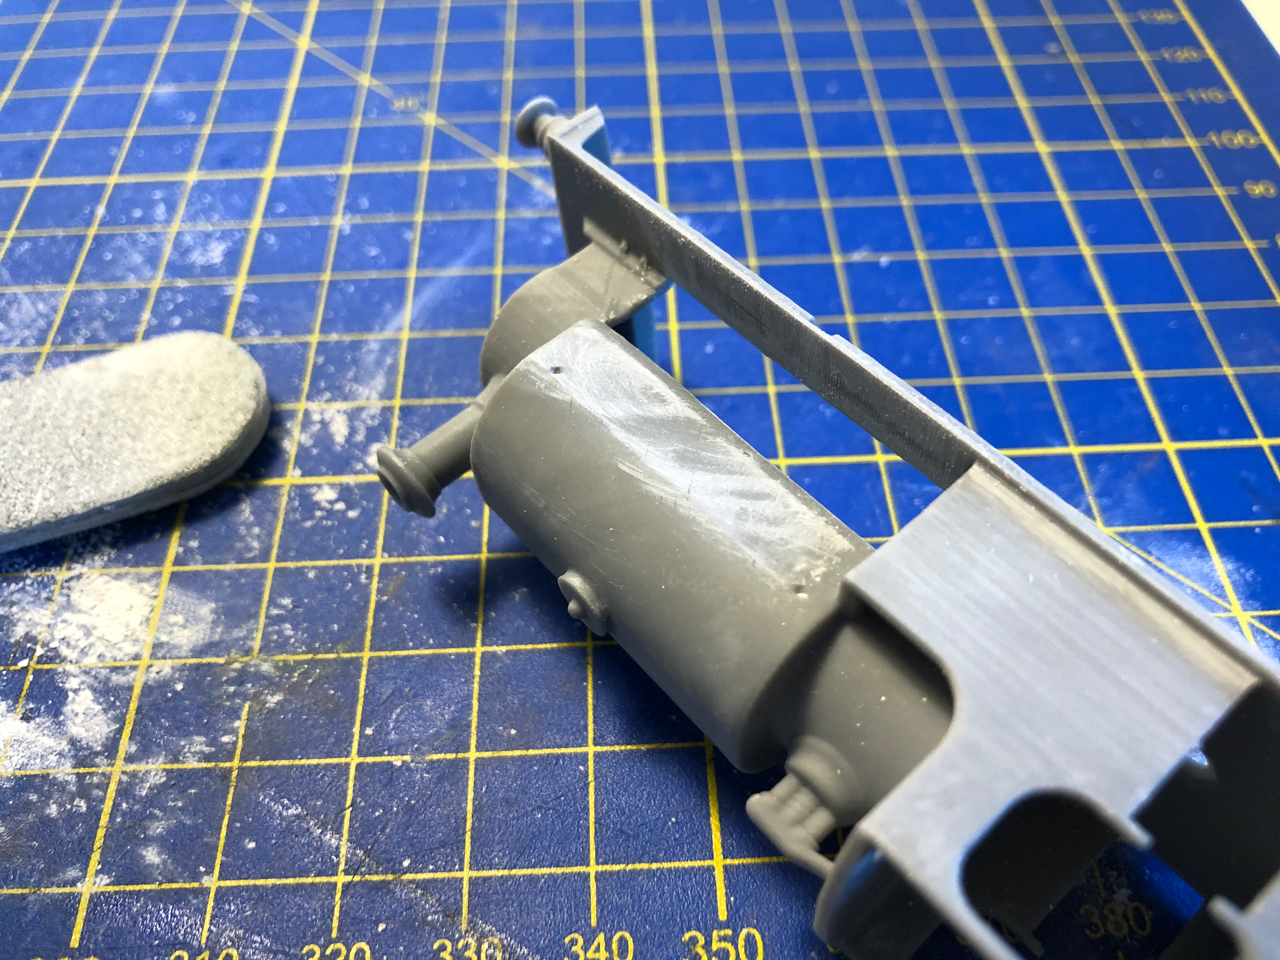


There are things I'd change - and I've spoken to Andrew about perhaps considering this in future kits. To me the chimney could easily be a detail part, as well as the buffers, which would more easily allow replacement with brass or white metal castings. I also believe some work could be done in the cab to think the walls around the spectacles and edges to improve the appearance.
However, on the whole, I would recommend the kits to both the new-comer and a more experienced modellers looking for a relatively easy project. I'll write more about finishing in a future post. More soon...

A light railway staple 😉
ReplyDeleteIndeed Harry, I wonder what she'll be finished as...
DeleteI must admit I've been tempted by this. The problem with starter kits today comapred to the days of whitemetal lumps is the price of the RTR chassi
ReplyDeleteIndeed - the same with 009 though. You don't get a good performing chassis for much less than £100 these days in any gauge or scale. Still, although this sounds a lot, as a percentage of average salary I don't think the current crop of models is any more expensive than the somewhat under par offerings of my teens from Lima and early Bachmann...
Delete