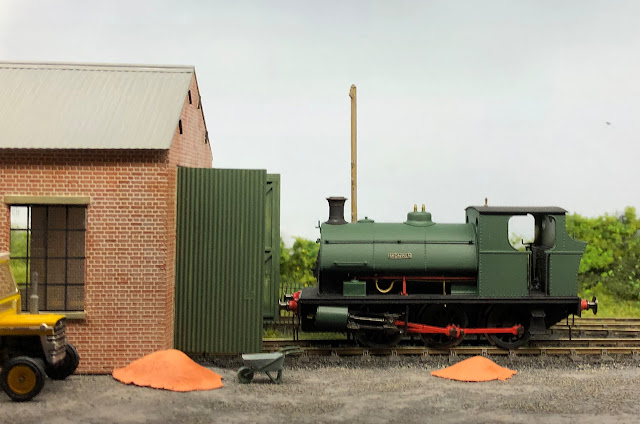
Pont-y-dulais: Coal and ash piles...
I've got a couple of Adrian Booth's books on Industrial Railway Engines Sheds from the Industrial Railway Society, and it seemed that most sheds that had a steam occupant would have an accompanying coal supply and ash pile...
Once dry they were painted with Humbrol enamels, 33 for the coal and 64 for the ash. These were left to dry, and then neat PVA was applied thinly to each heap. Hattons fine coal was applied to the coal heap, and seized ash from our coal fire used on the ash heap (which looks a touch too yellow I think, but it's a real coal ash!). This was tamped down with a finger. When dry the piles were pealed off the glass and glued in place on the layout, and extra coal and ash placed on the piles and secured with Woodland Scenics scenic cement to blend them into the ground.
How to go about it though? Anyone who has attempted a 'pile' of a loose material in 4mm scale will know that it just doesn't look natural, and wants to adopt a flatter appearance. However, I'm not sure if I've read about this before but it occurred to me that perhaps a 'former' was the answer. I'd seen someone building a Canadian layout on Facebook using foam as a core for a large pile of ballast - however not having any to hand I found a new packet of DAS clay and thought it might be just the thing.
The clay was pinched off the block and formed into suitable shapes, placed on a piece of glass from a clip frame to allow the bottom to be feathered to the ground. The coal pile by the engine shed was formed with a 90 degree internal corner so it could form around the shed in a natural heap.Once dry they were painted with Humbrol enamels, 33 for the coal and 64 for the ash. These were left to dry, and then neat PVA was applied thinly to each heap. Hattons fine coal was applied to the coal heap, and seized ash from our coal fire used on the ash heap (which looks a touch too yellow I think, but it's a real coal ash!). This was tamped down with a finger. When dry the piles were pealed off the glass and glued in place on the layout, and extra coal and ash placed on the piles and secured with Woodland Scenics scenic cement to blend them into the ground.
The result is pretty convincing and another neat finishing touch to the layout. Next up will be finishing off the engine shed, broken gutter and some interior detail, smoke vent and some weathering. I hope this technique may help others. More soon...


Comments
Post a Comment
Thank you for leaving a comment on my blog - I appreciate you taking the time to share your views. If you struggle to log in, please turn off the ‘block cross-site tracking’ setting in your browser.
James.