Colour vs texture… (N part 7)
Approaching N scale as a seasoned H0 (and larger) scale modeller I bring some mental baggage with me, a bias if you will to certain methods and techniques. I often consider texture as a model maker, yet in my opinion it is often colour and palette that is more important in bringing a model to life...
I have been keen to experiment with this concept in N scale too and where previously I've worked through my own self imposed blinkers in terms of detail in N, this time I'm working on track. Track, the literal foundation of a railway modeller. When well modelled we don't notice it, it blends in and just looks 'right'. Getting the right colours of rusty rails, worn sleepers and ballast tone, combined with a neat application (zero tolerance to stray grains) has served me well in H0, is there any reason why this same approach would not work in N? The only stumbling block I could see was the size of the ballast, would this look to coarse in N? I decided to explore this and talk the results over with Chris...
A step by step approach...

 Step 3: Once the enamels are touch dry I use a wash of black from Games Workshop applied to the rail sides and sleepers. This has the benefit of adding a subtle shadow to the rails and spikes, as well as highlighting the texture moulded into the sleepers.
Step 1: I have glued two short off-cuts of Atlas Code 55 to an old piece of wood. One has a length of 1.5mm thick cork, 20mm wide, glued underneath to experiment with a more mainline appearance and ballast shoulder.

Step 2: Painting the track, a key step in any scale, I use Humbrol enamels, just three colours and those that form a palette throughout all of my modelling. The orange and dark brown are used for the rails, the grey/brown and dark brown for the sleepers. I mix in a little white spirit to thin the paint, mixing a little as I go, and with the sleepers, I paint a few in almost neat light grey, and then vary the colour every 4-5 sleepers or so to break things up.

Step 4: Applying Woodland Scenics 'fine' grey ballast I use an old dice shaker to deposit small amounts in just the right place, being careful to not apply too much. Using an old paintbrush neaten this up, remember no stray grains in any scale.
Step 5: Woodland Scenics 'scenic cement' is applied with a pipette, I deposit the glue along the edge of the ballast and it sucks into the shoulder. As it goes, add more, it soaks right through to the centre ballast section and the approach means you don't disturb the neatly applied ballast.
Not only did I need not worry about the ballast texture, what I've shown is this approach, using colour rather than texture, has produced satisfying results in the smaller scale. Does this mean texture doesn't matter? No I don't think so, it's more that texture doesn't need to scale - it is the colours that matter more, as long and the ballast is 'stony' looking slightly over-scale grains don't matter... imagine the same goes for the scenery, grass that has a long thin texture, perhaps over scale even in H0, is more realistic than using ground foam.
Step 5: Woodland Scenics 'scenic cement' is applied with a pipette, I deposit the glue along the edge of the ballast and it sucks into the shoulder. As it goes, add more, it soaks right through to the centre ballast section and the approach means you don't disturb the neatly applied ballast.
Result: Neat, fine, realistic track, certainly as good as anything I'd produce in H0 scale.
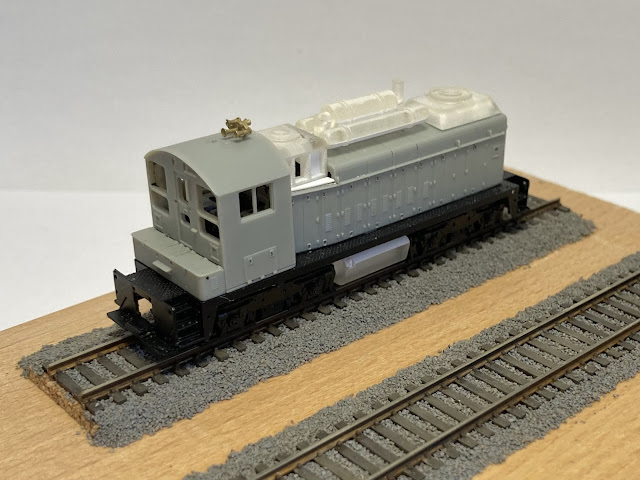
I posed the SW1200 on the track, and honestly, I can live with it…
That sounds odd reading it back. What I mean is, the benefit for me of N will be longer trains and more landscape. The downside could be smaller size and less (perceived) detail…
However I can live with this detail level, the SW1200 and track combined...
This is an important milestone…
This is terrific to see.
I like that we’re both starting from the same base materials so we can move from ingredients through technique.
When I was really active in N I seldom did much for colour variation on my track. I painted everything that standard oily-black-brown and moved on.
 |
| Chris's post Coy N gauge samples, Chris Mear's photo. |
When I built the post-Coy samples I was attempting to do in N as I had in HO. That colour method that I think worked so well in the larger scale was too bold in N and was too noisy. All those colours just highlighted the out of scale details in the track that uniform colour hid.
 |
| A cruel close up of my test piece, the mix of colours in the sleepers work really neatly, just as it did with Kinross in H0. |
It isn’t about seeing what it isn’t - what can’t be seen. It’s about what is there — what we can see when we are ready.


I so completely enjoy our conversation on the subject and the contemplation that inevitably flows from it.
ReplyDeleteChris
It’s a genuine pleasure, and the N gauge adventure has been incredibly rewarding so far, from that early encouragement. Thanks Chris!
Delete