Friday Update: Twenty-two Ten Twenty-one…
Small progress on lots of things and big progress on a few this week as half term approaches and I try and push a few models on before the holiday, so grab a coffee or a tea and let’s see what there is here today…
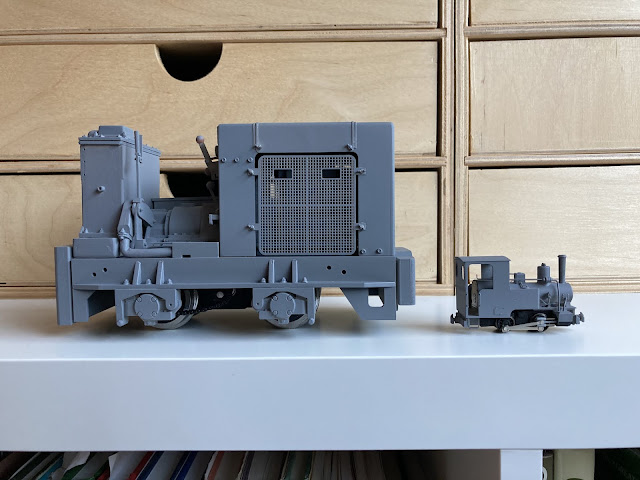 |
| Just look at those wing nuts… bonkers. |
It’s had some primer… there are two prototypes here actually, we’ll mention the big one for now, as the smaller is discussed below. The Ruston LB prototype is on the home straight, I got some primer on the body after fitting the etched grilles and it’s really come to life. Out in the day light the light catches the engine behind the grill really convincingly. The brake gear has arrived and is being fitted, and then I’ll get some paint on, at which point there will be just a week or two to firm up your interest in this model… £1330 ready to run hand made hand finished completely customisable in 7/8ths.
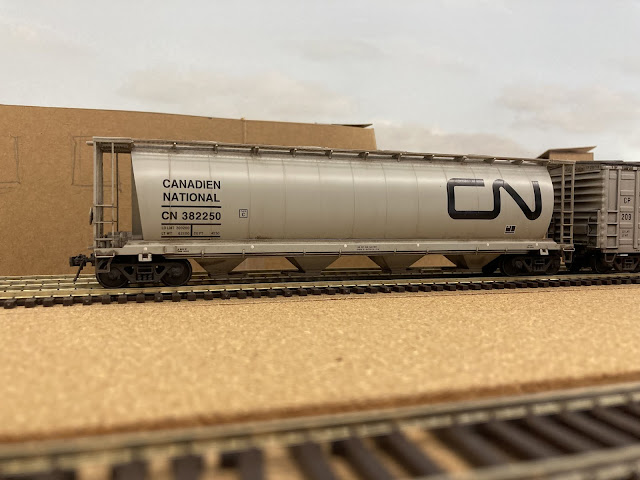
In the evenings I’ve been working on Beaverbrook on a few projects, and I’ll share a few of these over time as they warrant their own posts… however the weathering of another Walthers Mainline cylindrical hopper was a quick job with washes and airbrush. In the end I wiped a lot of the airbrushed dirt off as it darkened the light grey too much, which by happy accident resulted in a much more realistic finish. This basic model runs on upgraded Kadee Code 88 (narrower tread) wheelsets and has the trip pins removed and air brake hoses fitted. The walkways might not be as fine as some, and some of the detail moulded on, but they’re not bad once you’ve done a little work to them and they’re more easily available in the UK.
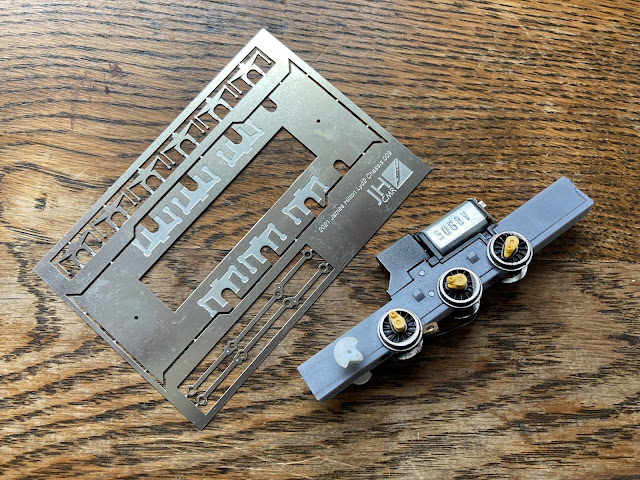 |
| 3D printed chassis with etched false outside frames. Rework of ready to run is a game changer for 009. |
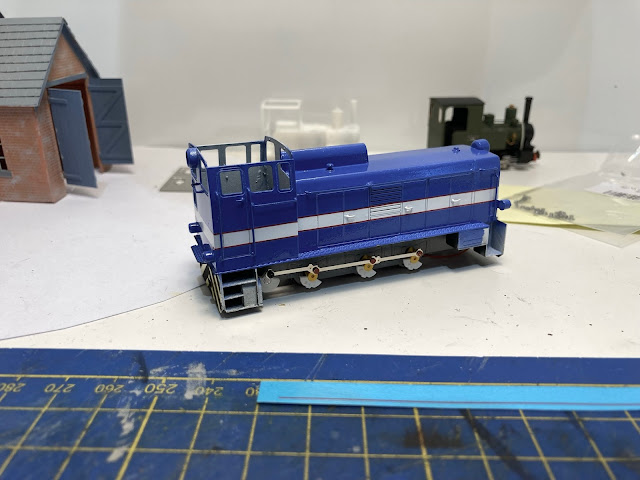
The Lyd2 I’m building for a customer has moved on, as the etches for the chassis arrived the same time as those for the Ruston. The chassis etch is just a false outside frame and springs, along with coupling rods. The modification of the 08 chassis to the new 3D printed chassis block is always fraught with worry, but despite a few ooops moments I’ve for a smooth running jack shaft fitted chassis. The bodywork paint is moving forwards too, with gloss white over the primer, masked for the stripes and then blue. Buffer beams yellow, masked for stripes then black and next up hand painting the black. The red borders on the white stripe have been added with Fox lining transfers, the etched plates will really finish this off…
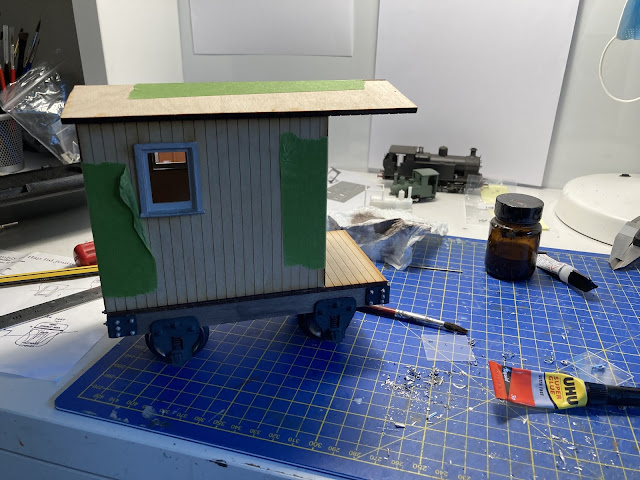
I’ve also been building another larger scale 16mm model, a simple ‘logging caboose’ in 16mm / G scale. This is from an Ozark Miniatures craftsman kit and has been fun to assemble, it’s worth noting that although called a caboose it’s really just a shanty. There are no brakes provided in the kit, although I might knock something up! Washed out worn paintwork next on this, which could be interesting over the plywood body.
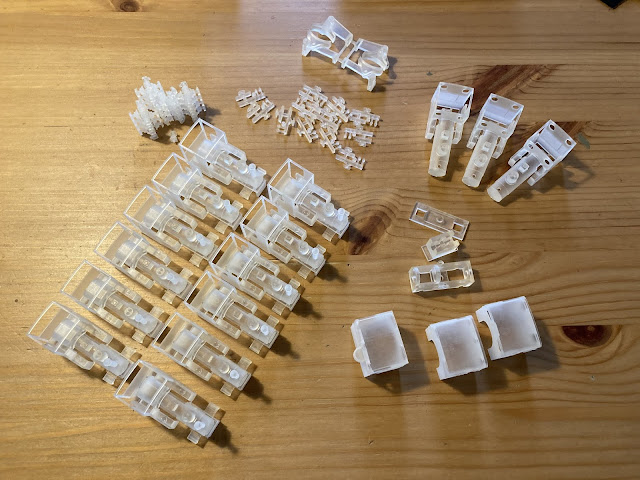
A few prototype parts and prpductjon kit stock arrived from Shapeways. This should allow a few kits to be restocked in time, some narrow and some standard gauge. More exciting, a few new ones to be progressed. Stock for the new narrow gauge kit is shown here, and the chassis parts for a standard gauge kit can also be discerned. I love a new arrival, cleaning and inspecting the prints takes time but is a lovely tactile task, and as the pile of models to create kits grows the thoughts of these turning into models for others to build and enjoy grows, what a lovely idea, to think of models I helped create brings a little joy to others in their own hand…
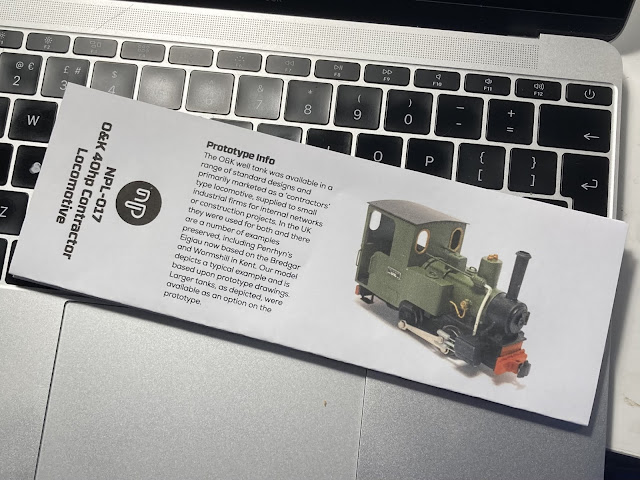
Mentioning the narrow gauge, it’s a rework of my son’s Andrew Barclay to remix the first kit I designed. The instructions are ready, prints are ready and etches are about to go to manufacture. That means we’ll see it released during November in time for Christmas! You’ll need a Nachmann N gauge Thomas The Tank ‘Percy’ chassis to complete it so perhaps get your hands on one in the meantime. If you’d like me to build one for you, then get in touch, as I will do a batch if demand warrants, in January.
This weekend should see scenery work on Creech Barn, as well as a start on roads on Beaverbrook so there will be plenty of time for distractions and relaxing here - I hope you all enjoy the weekend. Until next time more soon…
I really like the look of the weathered CN hopper ... I think I have a similar car still boxed in my collection somewhere ... I am now looking forward to giving it some subtle weathering ... all your projects come out very realistic ... much kudos to your methods.
ReplyDeleteThanks Rob, there is a post about the Alberta liveried one somewhere on here that discusses more of the process, if that helps.
DeleteOK ... I found the article on weathering ... thanks!
Delete