Everyday clay (N part 30)…
The Peco N gauge CDA wagons are lovely models for the money, crisply moulded and full of character, not 100% accurate but close enough for me, and, lets be honest, there is no alternative...

That said, as with other instalments in my N gauge journey this isn't really about the models, or a review as such, rather a reflection and commentary on 'good enough' and 'from my hand'. Modern N gauge is for me the opportunity to make use of what is available commercially in ready to run form, I'm not interested in 2mm finescale, or kit building. I don't have the time or patience for things this small. What it is though, is a wonderful escape from the usual OO (and larger scale) commission I work on for customers and an escape, in N I can fit all the models of my childhood in a much smaller space - and what is more, they're as good if not better than the Hornby and Lima models of 25+ years ago in OO.

The weathering of these prototypes is more subtle and nuanced then you'd imagine. Neither a dry brushing or an airbrushing alone would suffice to really capture the character of the finish. I started with a matt 33/98 wash on the whole model, wiped off but left heavier on the underframe which added some shadow to some elements of the bodywork - and as this is all work in enamel, left to dry for a 24 hours. Next was dry brushed Humbrol 28 which is called camouflage but is actually a lovely off white - I use it for handrails and things usually. Using a wide flat brush deposits a nice mix of streaks on the body panels and collects around the framing of the chassis and lower body, again left to dry for 24 hours. Finally, a wash of thinned 28 was applied over the whole model, and carefully wiped off the logo - as on the example I was copying, this had been wiped clean.


So when I say 'good enough' that's a measure of my interest as much as the fidelity of the model. These CDAs look like CDAs out of the box and with some gentle weathering very much the part. Largely fine mouldings respond well to a bit of 'from my hand' weathering... Replace the massive rapido coupling, slap on some clay dust and bob's your father's brother! Is it though? The more I looked I felt they just needed a tiny bit more to really pop, especially in the bodywork compared with some of the more recent Farish releases (the Polybulk I also have, and the equally wonderful Presflo). The canopy in reality has a boom support for the central beam at each end - and some sort of handle release too - the former I've knocked up in 0.35mm brass wire fitted into a small hole drilled into the centre tarpaulin support, the latter, I've not worked out how to replicate in a repeatable and robust manner - but it's on the to do list!
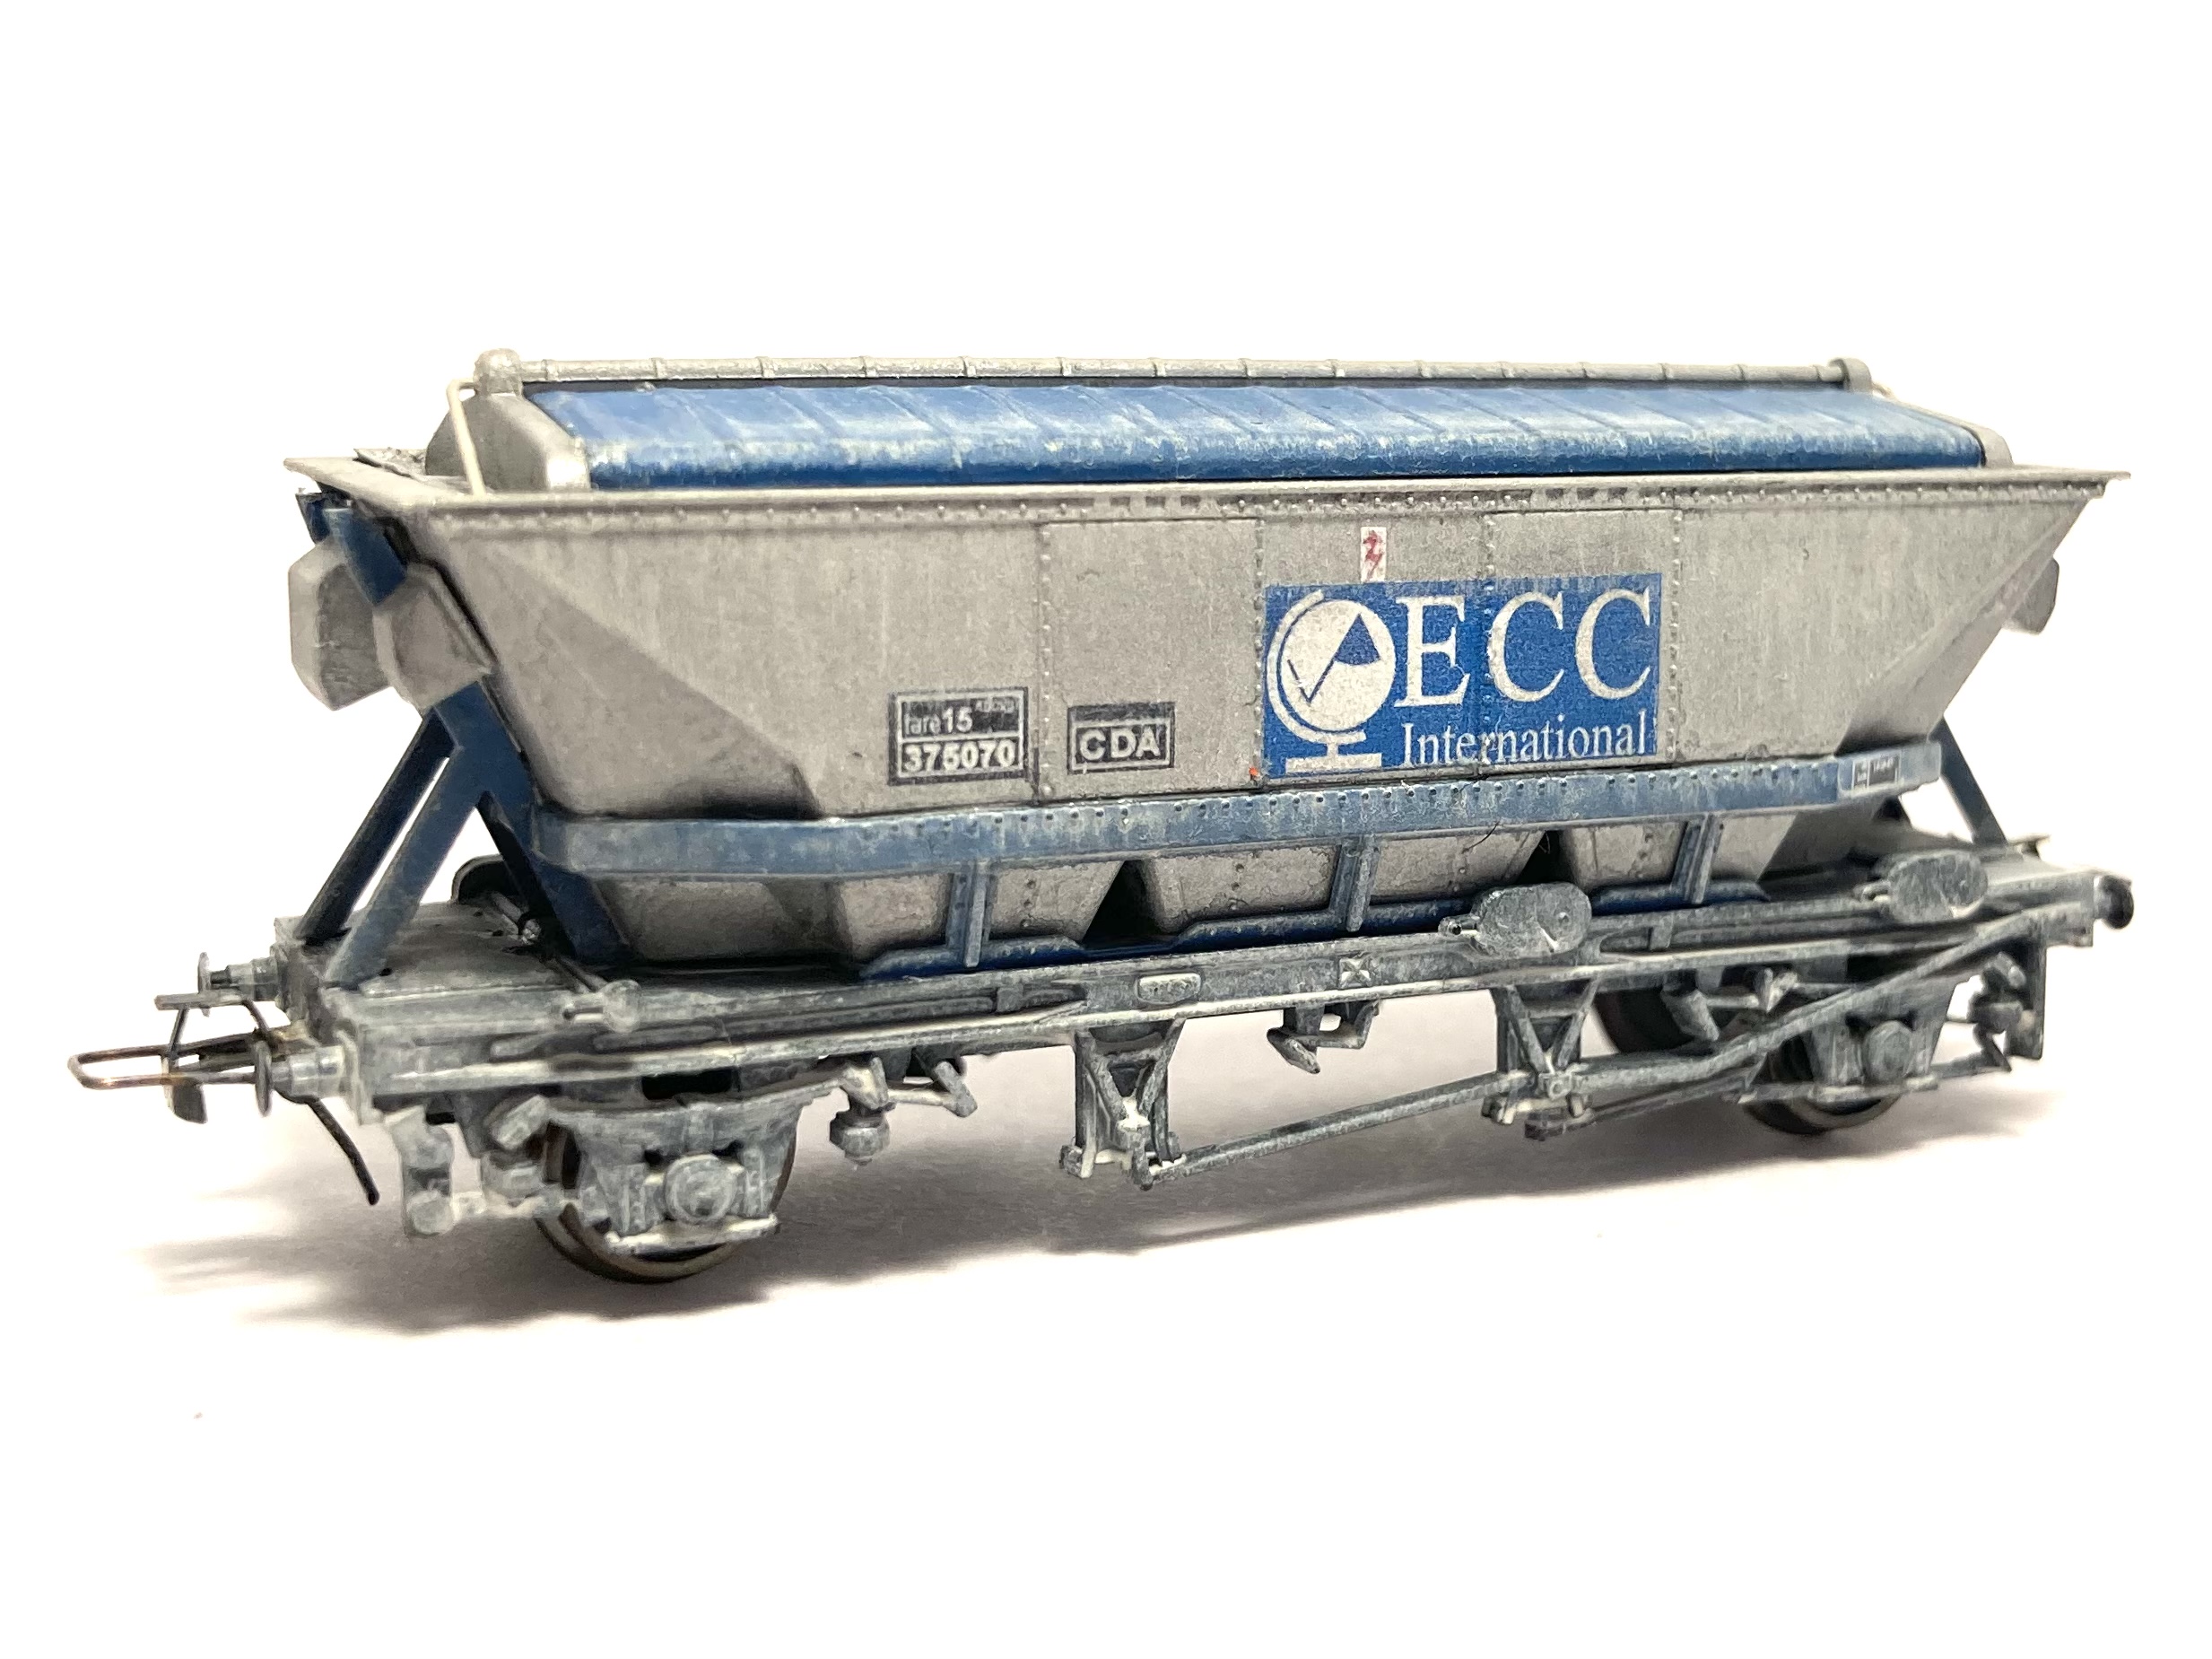
The nuances in the finish mean a few more steps to add the character are needed though... if you notice there are a series of slots along the side of the hopper body on one side, and these tend to have a yellow brown (rust?) streak. First off, the slots... some matt black 33 in my Grandma's old bow pen, set to 0.2 and very carefully applied over the weathered finish. The Peco ECC markings are a little too large, so they're not quite the same as the prototype, but I tried to get them in the right place... again, this is enamel so let it dry for 24 hours. Then a tiny amount of Humbrol 133 was brushed along a few of the black marks and a wide (approx 1cm wide) flat brush was soaked in thinners, then touch dried leaving it just moist. This was dragged vertically down the body, pulling the brown down the bodyside and aping that streaking I'd observed on the prototype. The last thing was a spot of black greasy paint on the buffer heads - another common trait seen on the prototype.

The result is a wagon that breathes character. Carefully observing our prototype and understanding which elements to recreate and which to broad brush is a skill that takes practice and a keen eye. It's not a slave like approach to prototype, rather an art form. These cruel close ups show both the individual brush marks and the way these blend into an overall finish. I'm excited to practice my theories and methods in this smaller scale, I'm constantly surprised at how much just works, and even more so, have to keep remind myself that the results really are N scale, the same scale as the toys my Grandpa played with 30 odd years ago - we've come a long way in terms of the quality of out of the box models (in all scales) and this journey is proving to me that I can build a 'grown up' model railway in this smaller scale. I hope it's enjoyable for you to read, and perhaps even opening your eyes to the possibilities of N, or at the very least, guiding you through the thought processes I have when creating my models. Until next time, more soon...
Donate
I love writing and creating material for the blog. If you enjoy what you read and engage with I would be appreciative of any donation, large or small, to help me keep it advert and restriction free.
Comments
Post a Comment
Thank you for leaving a comment on my blog - I appreciate you taking the time to share your views. If you struggle to log in, please turn off the ‘block cross-site tracking’ setting in your browser.
James.