Plymouth for Creech Barn: Part 1…
Both times I have visited Statfold Barn I have been rather taken by their 'works shunter', the Plymouth diesel number 7. It has always reminded me of the old AHM/Minitrains example, as if Statfold is a giant model railway...


I chose to retain the moulded 'tools' on the back of the cab for two reasons - first, a nod to the models origin and second, I was not certain I could remove them and smooth the area without loosing a lot of the fine rivet detail on the back of the cab.


The idea of building my own version for Creech Barn has been mulling around for some time, taking the essence of the prototype and creating something with character whilst not being overly concerned with rivet counting accuracy. This process of distilling a prototype's character for recreation in miniature is perhaps the topic for my next book - time will tell.

Starting with a recent Minitrains body and frame sans motor block meant I could use a Minitrains Gmeinder unit under the hood - which is a food thing as it's a much better chassis than either the original AHM or the revised Minitrains offering. Comparing the shell to the prototype I noted a few things, this is usually fairly subconscious, but as I'm trying to distill this process to be able to document it, I was a bit more mindful with it this time... I start by spending time with the model, looking as the body shell, deciding what detail needs re-working, what can stay - and at the same time I spend time with prototype photos, noting differences and similarities. Determining the defining features is a bit of an art form and I'll not try and describe that process today, suffice to say, it is my intent to document it at some point!

I felt the cab windows and doors although different were close enough, as was the bonnet but the exhaust shrouding in front of the cab, roof mounted horn and bell all needed to be represented. I also noted the buffer beams were plain sheet with no rivets or signs of previous foot boards - this was the 'to do' list then:
- Fill cab front window
- Fit exhaust shroud
- Replace cab handrails and add bonnet handrails
- Fit bell and horn

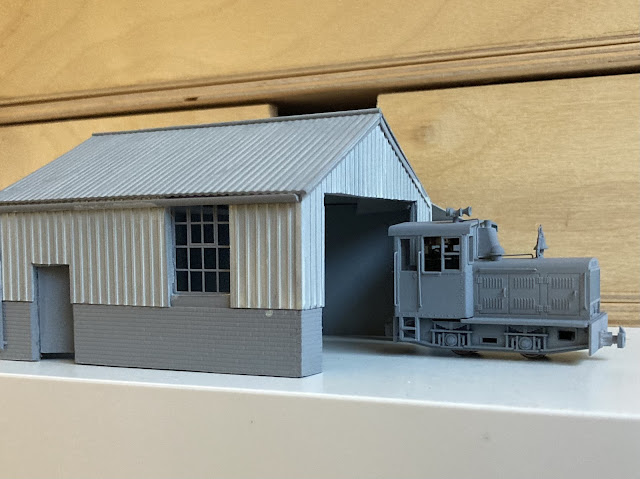
So at the end of this first part you'll see I've used 30 thou styrene and filler to blank off the centre cab windscreen and then 60thou layered up to create the exhaust shroud, filed and sanded to shape. The bell and horn came out of my North American 'bits' box. The footplate had the buffer beams cut back and smoothed and a 20 thou styrene replacement fitted with a Narrow Planet 'Bosna' coupling.

It will head off to the printshop next, and I will also draw up some suitable cab side lettering to have custom printed, suitable for the Creech Barn layouts probably CGR (Creech Grange Railway) like on the O&K. This little project has been a welcome distraction from larger more serious commissions and has given me the energy to do some more work on the layout itself (as you can see in the header photo - the engine shed is well under construction - more on that another day). Until next time, more soon...
Donate
I love writing and creating material for the blog. If you enjoy what you read and engage with I would be appreciative of any donation, large or small, to help me keep it advert and restriction free.
I think the windows would be worth a second thought. On the prototype they give it a glasshouse look. I think the steps need adding at the front as well, which then make sense of the handrails there.
ReplyDeleteInspired rather than a slavish copy, the donor model is cutely proportioned but that isn’t quite prototypical. That said, I suspect you’re right in the front step. Cab will stay as it is though, this is Creech Barn’s version!
Delete