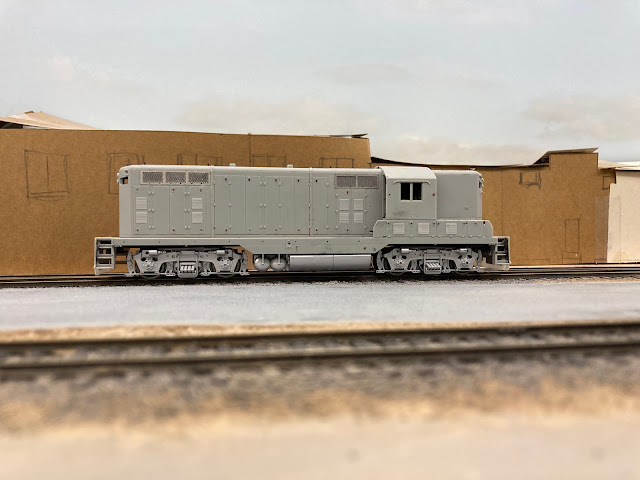
How do you become the modeller you aspire to be? A blend of model making, engineering, artistry and personal choice, for me improving ready to run models was both my entry point and continues to be a real personal pleasure, and so here is, I hope both an instructional and encouraging post…
The model you see above is a late 1990s/early 2000s Lifelike Proto2000 GP7, and it’s current state. These aging models are superb examples of the Chinese tool makers art, they’re well constructed and very fine indeed, but replacing the moulded radiator side grills is a real lift and a fun little project that will scare and stretch you, but the results are worth the personal growth. This is the second model I’ve done in this manner, and it’s still a little nerve wracking though for me, it isn’t the first cut, but the last stick that is the terrifying moment! I’ll annotate these photo captions to give you a bit of a walk through if you want to repeat something similar.
The etched nickel silver parts used are from Keyser Valley models, Scott offers a range of details that suit North American diesel locomotive detailing projects in H0 scale. |
| This is the model with all details removed and after a bath in IPA to remove the paint work. At the least I was planning on replacing the plastic grab irons which although separately applied feels little clunky - but the opportunity to go further, as I have with my CF7 conversion (and on the similar GP9RM in the Kaslo kit). |
 |
| Basic tools required - a mini drill with in this case a 0.95mm bit, but anything around 1mm would be fine, and a curved ended craft knife blade, easier for paring off the surrounding details. The model has been broken down into component parts so I can work on the hood in isolation. |
 |
| A series of holes have been drilled around the inside edge of the grill. I checked to see how much needed removing by offering up the etched replacement. The grill on the right has some extra holes in the centre, this can help removal and ease of pushing the knife in, but isn't strictly necessary. |
 |
| Use your craft knife to press the grill out carefully. Once removed clean up the opening and smooth the sides with the blade. Then you need to pare away the raised surrounding of the grill on the bodywork, the curved blade makes this easier. Go slowly and use a new(ish) blade. This is a critical stage, and should not be rushed. Don't worry if you score the body, accidents happen. A small amount of filler and a rub with wet and dry can mend any damage. I use some wet and dry superglued to the end of a stick to gently smooth down the last remnants of the moulded surround. |
 |
| The etched parts need careful removal from their fret. I use a blade to cut then close to the fret, not the part, and then a pair of snips (on this old pen knife, but precision etch cutters would be good too) to cut back to the part. The inners need the louvres bending out, slip the blade in the small gap and open the first to 45 degrees, and repeat. They bend 'out' (rather than in) and then fit neatly within the thickness of the bodywork. Apply a drop of superglue to each corner and tack in place carefully, and add a little more superglue with a precision applicator or on the end of a piece of wire. Add all four inners first. Then the outers can be attached in the same way, these are a one stop 'do or die' and are difficult to rescue if they go on wrong. Do plenty of dry runs, alternately, you could use canopy glue or similar which give you more time to adjust the part, just do one side at a time in this instance and let the glue grab before moving the model. |
The very first 'real' modelling I did beyond kit assembly was adding Craftsman white metal detailing parts to buffer beams on my Lima diesels aged 10 or so... today's efforts are both a long way yet a short way from that start, modifying models with detailing parts another of the ribbons through my modelling life. The skills these projects teach us can cascade into other aspects of the hobby, and picking up an older model, like in this case the old Lifelike Proto series, and breathing new life into them is both a good way to 'rescue' them from landfill as well as saving some £££ over the current all singing all dancing releases from the big players. I hope my meandering commentary today has been interesting, and even more I hope it has been encouraging. Take a go yourself and see where the journey takes you. Until next time, more soon...
Donate
I love writing and creating material for the blog. If you enjoy what you read and engage with I would be appreciative of any donation, large or small, to help me keep it advert and restriction free.


Perfect timing - thank you!
ReplyDeleteJames, if you dig about on here there are other encouraging posts as well as more advanced but still instructional materials. IIRC your chassis building will be good fun, High Level stuff goes together well in my experience. A 25w iron, some 185deg solder and liquid flux will transform your results. Good luck!
Delete