GP20C-eco in the raw…
This ‘new’ GP20c-eco is a 2013 vintage product of Progress Rail, built for Canadian Pacific with trucks and traction motor components from traded in GP9s as basically a ‘new’ 2000hp road switcher…

Overall, it’s the length of a GP38 or GP40, but with the crash-worthiness cab the proportions begin to remind you of the elder statesmen, the GP9, with the balance of long and short hood lengths. It’s V8 turbo 710 engine has a completely different engine note compared to the 567 or 645 powered road switchers we’ve become accustomed too, that said it is not without character, and it’s usefulness to CP despite the massive reduction in branchline mileage in recent years is clear with the 130 units they now roster.

My model is almost ready for paint, and I try and take photos at this stage to look for missing details or problems I need to rectify. There is nothing like zooming in on a photo to find the stray hair, the bent handrail, the nub of solder, yet also these photos provide a snapshot of a project in time and tell a story about it’s creation in a way that complete photos can’t and words can struggle with, these photos show how things work.
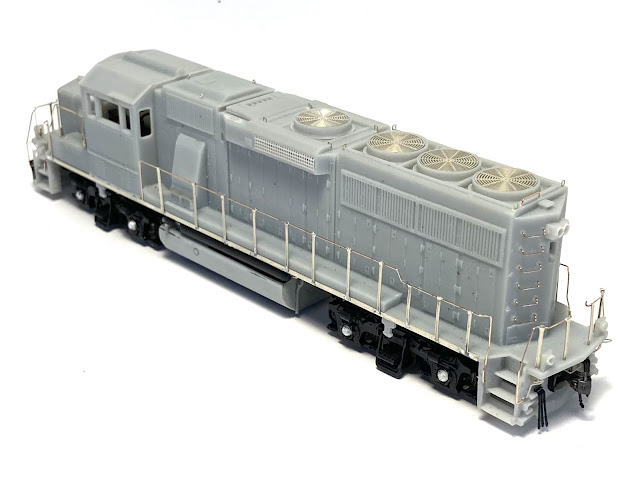
The Briggs kit consists of a 3D printed kit of parts and etched details. Things I love are how well the body and parts fit together, the crispness of much of the detail is amazing. The combination with etched parts is good, and one I’ve used for years with Narrow Planet, EuroNG, 6point5 and recently Planet Industrials kits. The handrails are good, but could be improved. They tend to create too flat a vertical profile that can be improved by tweaking the very top of the etch outward a little, and the way they fit into the chassis could be revised. Drilling dimples and a pin instead of a tab would do away with the etched plates down each footplate that I’ve struggled with getting to stay stuck in place. Mind, everything fits perfectly first time and the handrail bending template a real aid when forming these especially with the multi bent footwell rails.


Some of the underframe detail I’ve added is more ‘representational’ than entirely accurate, like how I model in the narrow gauges, but when painted dirty black and hidden in shadow the relief will trick the eye to seeing what should be, rather than what is actually represented. By ticking off the obvious differences (journal end caps and fuel tank shape) some of the other things can take a back seat, their omission not obvious. A trick I also employed on the CRS20 recently.
Next step, finish off the pipe work on the frames and fit the horns, and check what MU connections feature on the ends. Then it’s time for some primer, and my favourite step as the model comes alive. Until next time, more soon…
Back when I lived in London Ontario I used to watch a pair of these run local freights around. They weren't really anything special in person, but being basically brand new they were REALLY shiny! One thing that frequently struck me was how short their trains often were, despite operating as a pair, so I suppose they must be quite fuel efficient.
ReplyDeleteThanks for the memories Scott, mine will be pretty clean too, I don’t think they’re anything special as you say, but the fact that they are pretty much the first ‘new build’ GP for a decade or so I think that appeals. I know they reuse trucks and traction motors, but I presume that’s for accounting purposes. To all intents they’re new (frames, tanks, bodywork, cab, engine and transmission). Thanks for commenting!
Delete