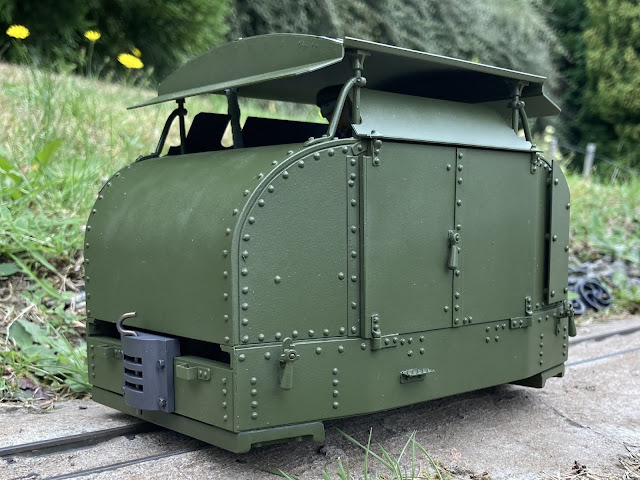
The challenge of patchy paint...
I often skip past photos of un-weathered models, when there is a commission I push on to the finished article, but I wanted to show today some of the effort I go to to achieve a realistic finish, especially on larger scale models...
This WDLR armoured Simplex, or 'Tin Turtle' has been built from a Swift Sixteen kit, but my customer wanted a work worn preserved appearance. The reference photo provided showed paint in a generally good condition but not consistently glossy, or all over matt (or satin even). A patchy effect, especially on the ends, was evident.
I sprayed the model initially in Humbrol Matt 30, light olive... this required a few coats to get a good density, but of course is very matt. I decided the move forwards by then gently misting over a clear lacquer from Halfords. This begins to add a sheen, a patchy sheen, all over (but stinks, so use it outdoors).
This didn't look quite right though, so I then misted on some Testors / Rustoleum 'matt lacquer' to soften the edges. The result was planned, hoped for even, but definitely something of luck in this sort of less than consistent finish.
I will be leaving it to harden for a few days before moving onto weathering, but I hope this shows that it's often as much about the paintwork preparation as the weathering washes, detail paint and airbrushing itself. Until next time, more soon...


Comments
Post a Comment
Thank you for leaving a comment on my blog - I appreciate you taking the time to share your views. If you struggle to log in, please turn off the ‘block cross-site tracking’ setting in your browser.
James.