Commission: Fancy another beer in N...
Picture this… you can’t see it but you hear the roar of the GP40, the flanges of it’s solitary covered hopper train protesting at the curvature of the street track-work, squealing and screeching, bell ringing, the hopper comes through the doorway into the building, progressing slowly, through to the yard beyond, as the loco follows filling that room with noise, exhaust fumes in the air and up your nose, the ground rumbling as it moves through the space to the yard beyond…

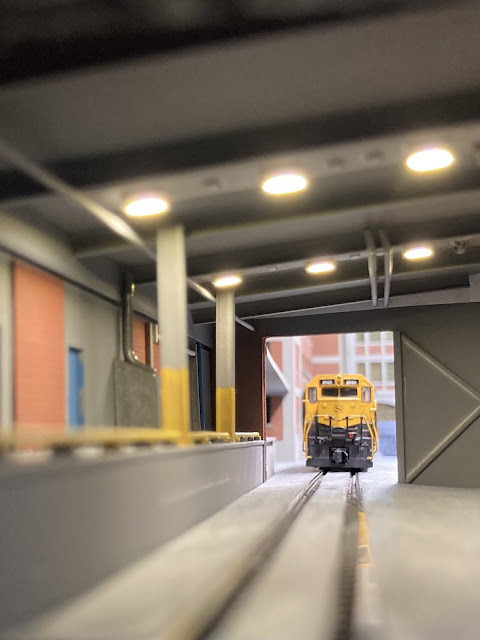
This is it - the two windows giving the 'inside/outside' effect of the prototype, the cut-away showing us the train on it's journey to the brewery yard from the street running off-stage left. Each element of this composition has been considered and whilst the finished result feels very natural this is not an accident. Height and width of the windows, arrangement of structures, brightness of light and colour temperatures all part of making the finished result a success.

The original scheme, discussed here on the blog and later published in my first book 'Small Layout Design Handbook' (plug alert - the reprint is available from all good railway bookshops) has been realised in just 55 x 10cm, the latest in a series of N gauge 'Mosslanda' (IKEA shelf) based layouts. An experimental concept, success wasn't a given - but in this case, nor has it been hard won. Let me give you a walk through the project now that it is complete, and hope to inspire you to build your own minimum space cameo model railway.

The layout is contained in a 6mm MDF cameo box to my usual construction - but with a plywood base to allow a 'captive' fiddlestick support to be included. The LED lighting extends a little beyond the left hand edge (as you view it) to give even light on the back scene. This strip has been cooled with Tamiya clear blue X23 on every other LED - giving a whitening effect and removing the warm yellow tint of the natural white base strip.


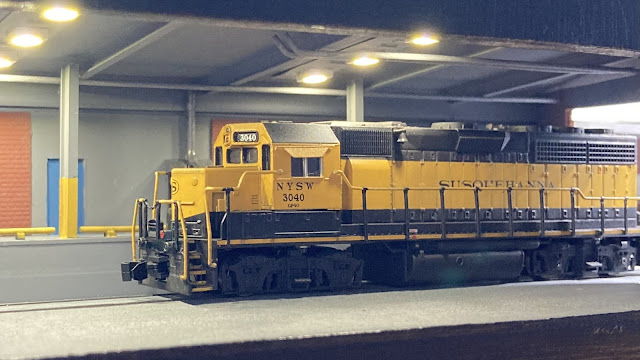
The scene is created from a series of modular structures all constructed from styrene. The tall warehouse on the right is a kit bashed Walthers model but the rest is scratch built in 40thou material with a brick overlay in places and various sections of Evergreen extrusion. This allows for complete control of the space and has allowed me to add interior lighting fairly easily within the building. This is the same LED strip I use for the main lights but I've added a 1k ohm resistor to reduce the intensity.


Yes, operation is not scintillating but the slow speed performance of the Atlas GP40 and evocative sound work really well in the enclosed space. To give the train somewhere to go the fiddle stick can be added (above). You will also note I've painted this layout black - not grey - a request of my customer. The DCC track feed and 12v lighting feed are 2.1mm panel sockets glued into the end of the board.

The whole scene is deliberately stripped back. I've not added a lot of clutter, furniture, boxes, barrels, people - no, the scene is almost the 3D realisation of the sketch... drawing in reality perhaps? I wanted the locomotive to be the focus, the layout just a stage. I hope you agree that this approach has worked well in this manner. The stage is consistent, coherent but not noisy.


The model has been painted in Humbrol enamels - I'm not sure if when the range was designed all those years ago it was a conscious decision but I love the way they harmonise with one another providing a slightly faded and de-saturated look. In the interest of both time and visual noise the brickwork is just painted with Humbrol 70. Concrete is light grey 64 and the railings trainer yellow 24. The 'white' pipework is actually a pale grey, 28. The road surface, made from 1mm thick Daler mounting card was cut precisely to fit - allowing the buildings to 'drop' into the layout and hide any un-sightly gaps along their base. This was painted with Humbrol gloss grey 5 and then talc liberally spread over it. Once dry, this is vacuumed off and the railheads cleaned. The card is just below the rail head allowing the track to be cleaned easily. All structures are removable, should the layout ever need to be dismantled.


I'll finish with the inspiration for the project - one of Railroading Ramblers excellent videos of the operation. This view, through the end of the layout, reminds me of the emotional response I felt to the source material when the sketch and design was originally produced. Over time this has matured nicely, and fuelled the results here - if you'd ever like to work with me to design your own layout, or to create one of mine, then get in touch for a no-obligation proposal. Until next time though, more soon...
Support my work
I love writing and creating material for the blog. If you enjoy what you read and engage with I would be appreciative of any donation, large or small, to help me keep it advert and restriction free. Alternatively, feel free to buy me a coffee.
Stunning.
ReplyDeleteI love one word comments! Especially like that, thanks Stephen!
Delete